ucsd-creative-robotics
Getting Started with the Dev Board
This tutorial walks you through initial getting started activities to set up your dev board.
1. Software Setup
Install the Arduino IDE on your laptop.
Download link: https://www.arduino.cc/en/software
2. Setup and Configure the Dev Board
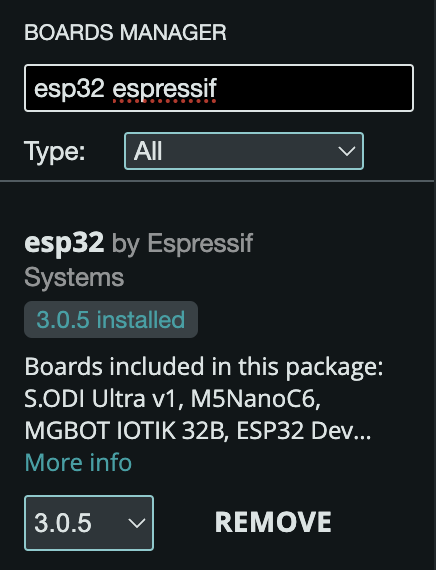
- In Tools -> Board: -> Boards Manager install the esp32 board definition from Espressif:
- Connect your board via USB-C cable.
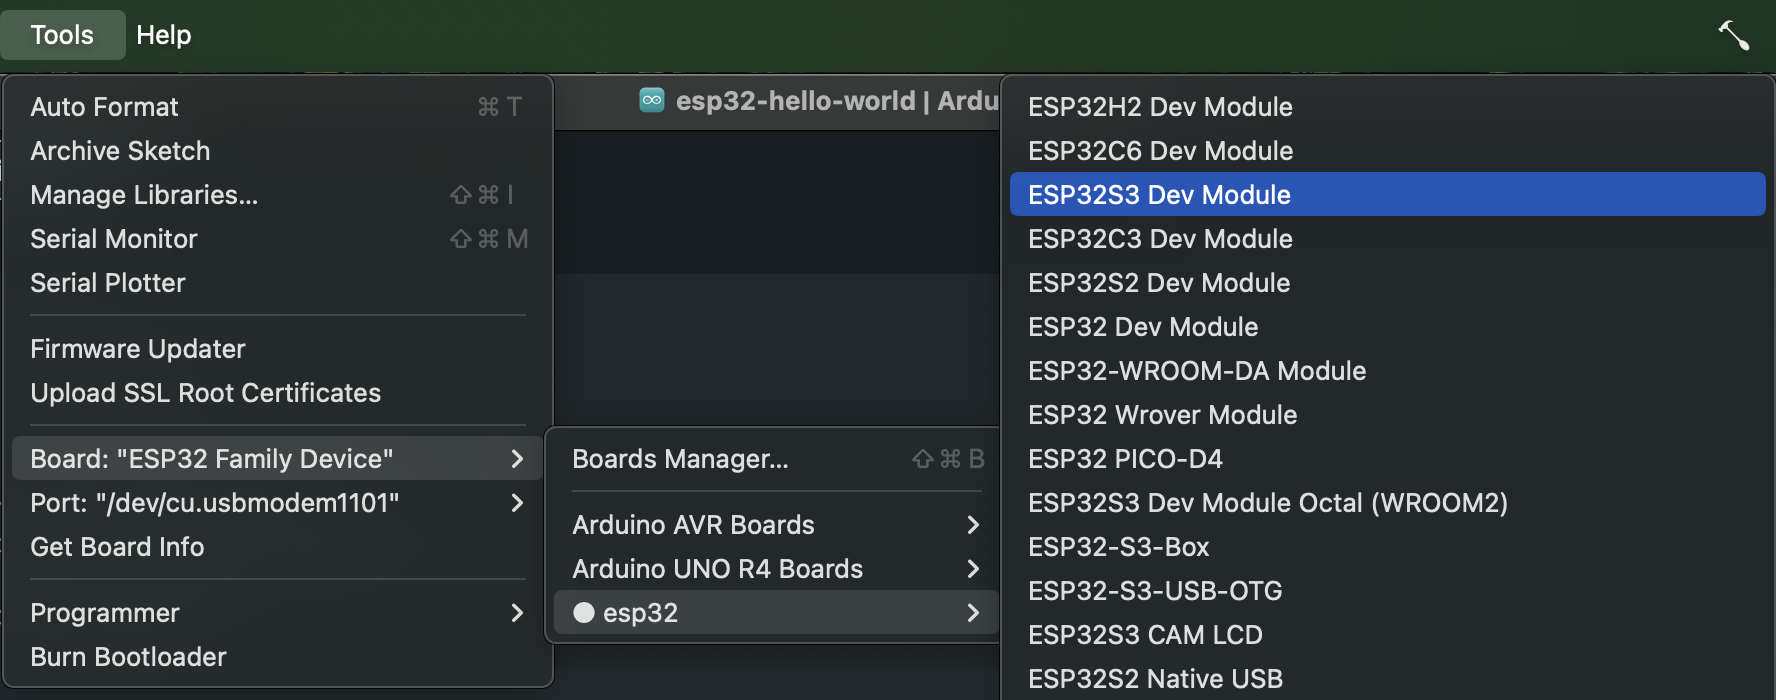
- In Arduino, under Tools -> Board: select ESP32S3 Dev Module
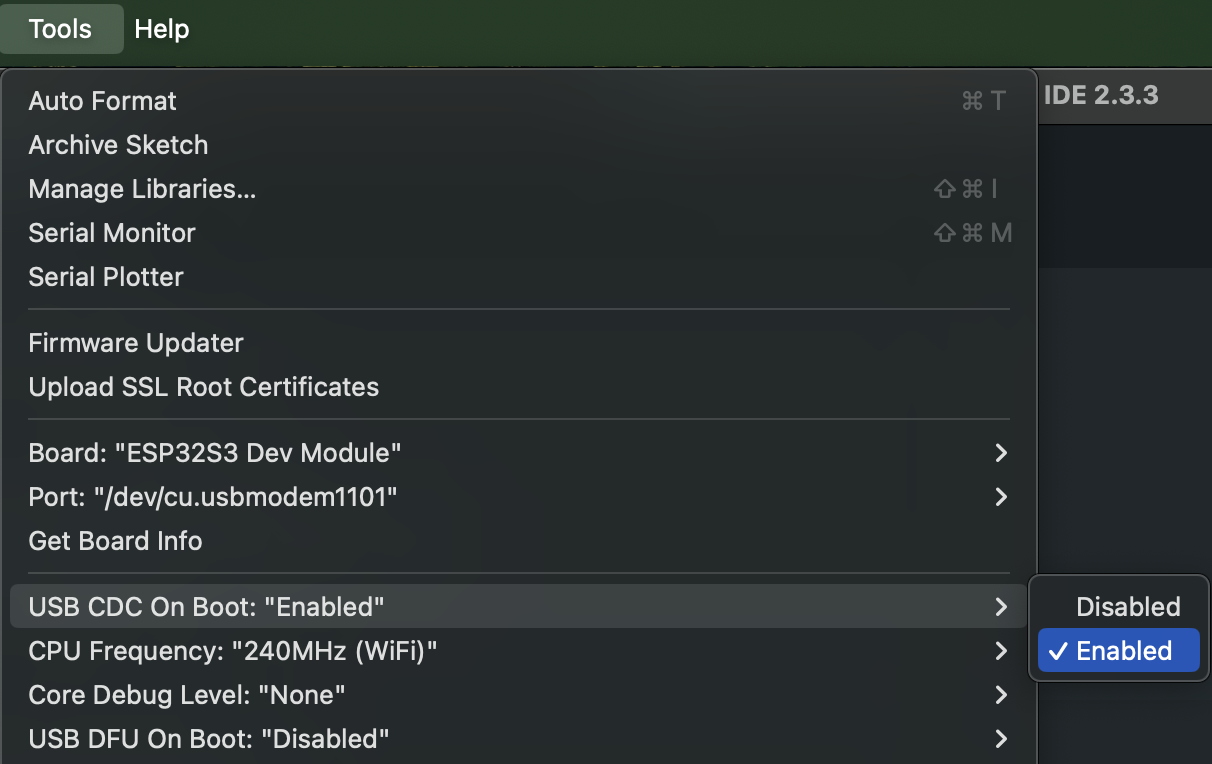
- Under Tools select USB CDC on Boot: to enabled (this enables the serial monitor and serial port)
4. Upload your first program
Hello World
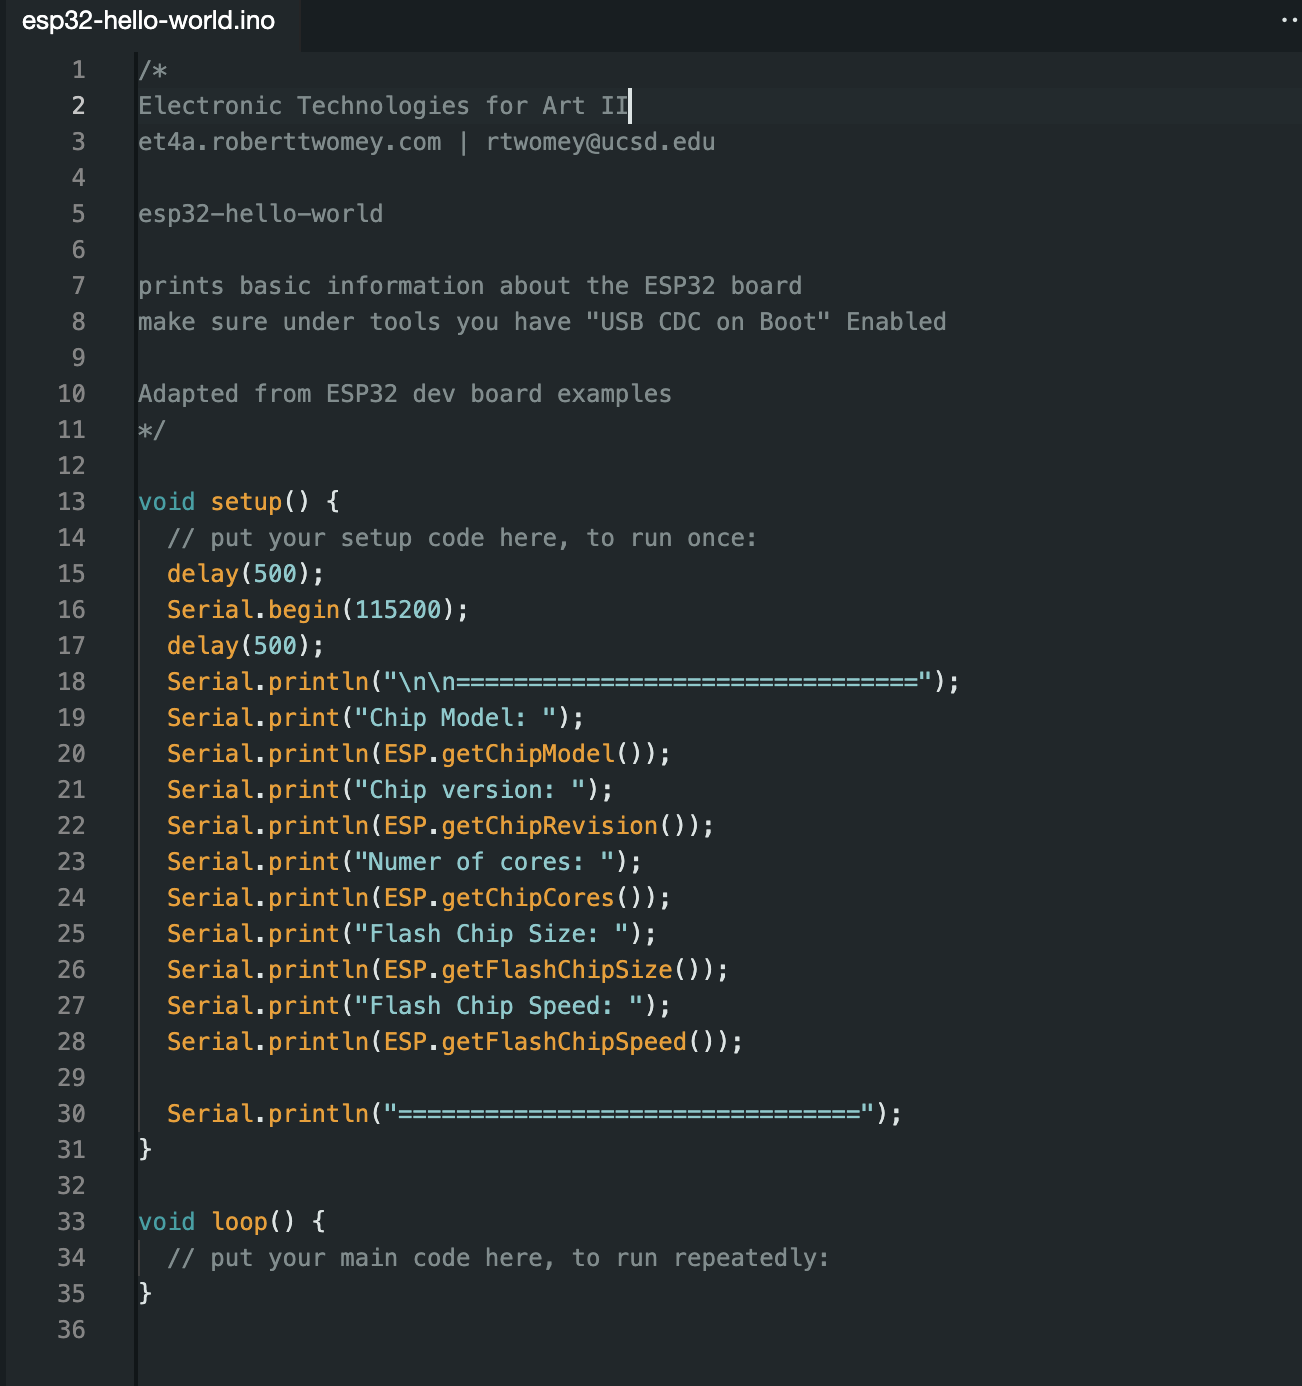
Prints basic info about the board to the serial monitor.
5. Blink
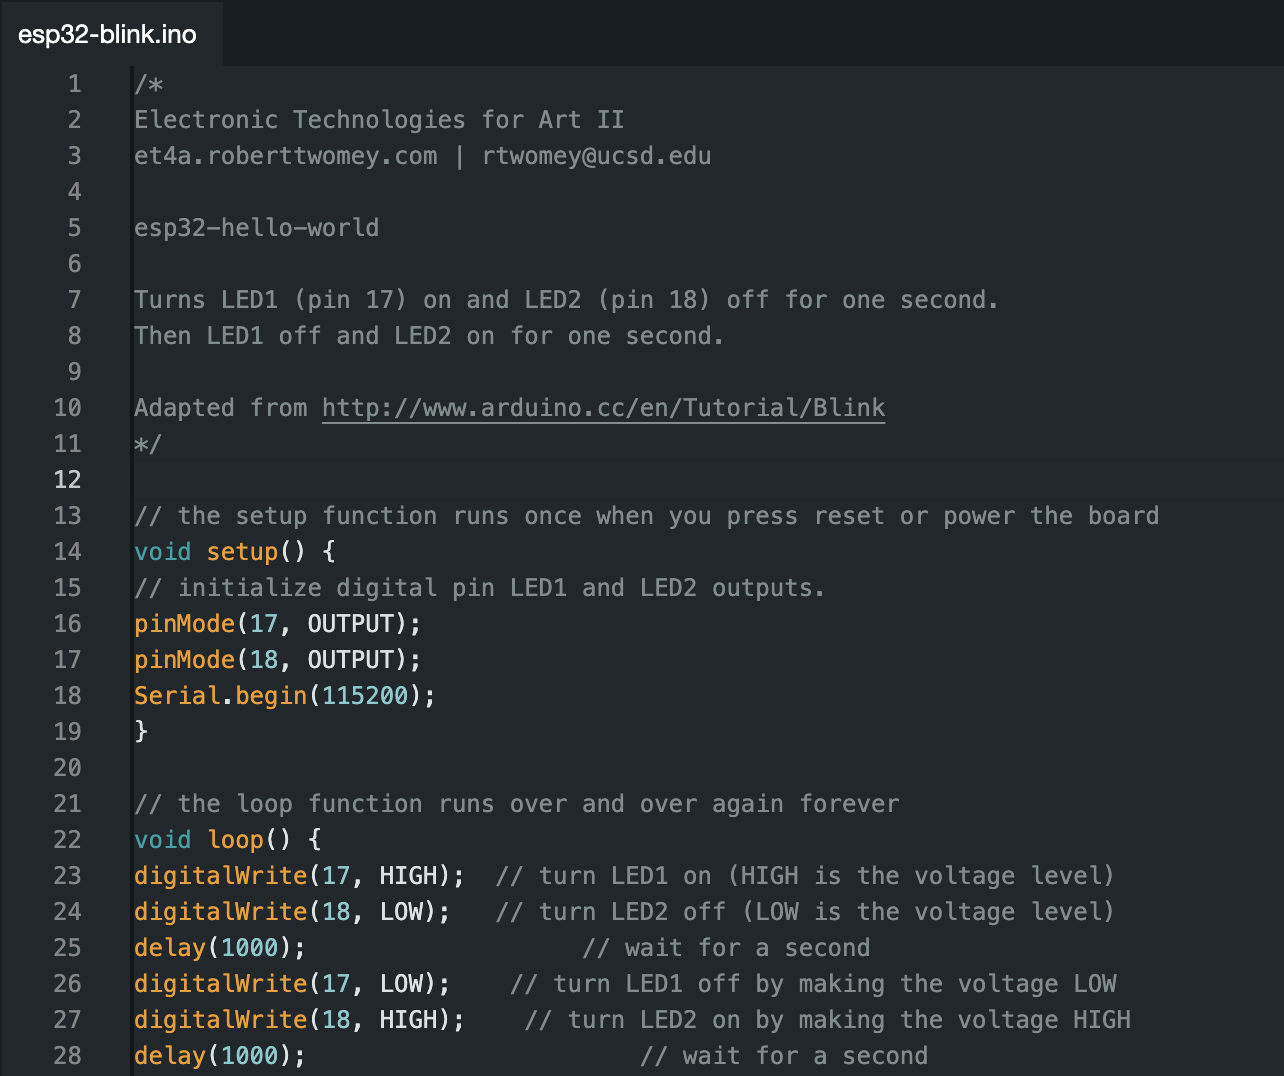
Turns LED1 (pin 17) on and LED2 (pin 18) off for one second. Then LED1 off and LED2 on for one second.
6. Optional: Fade
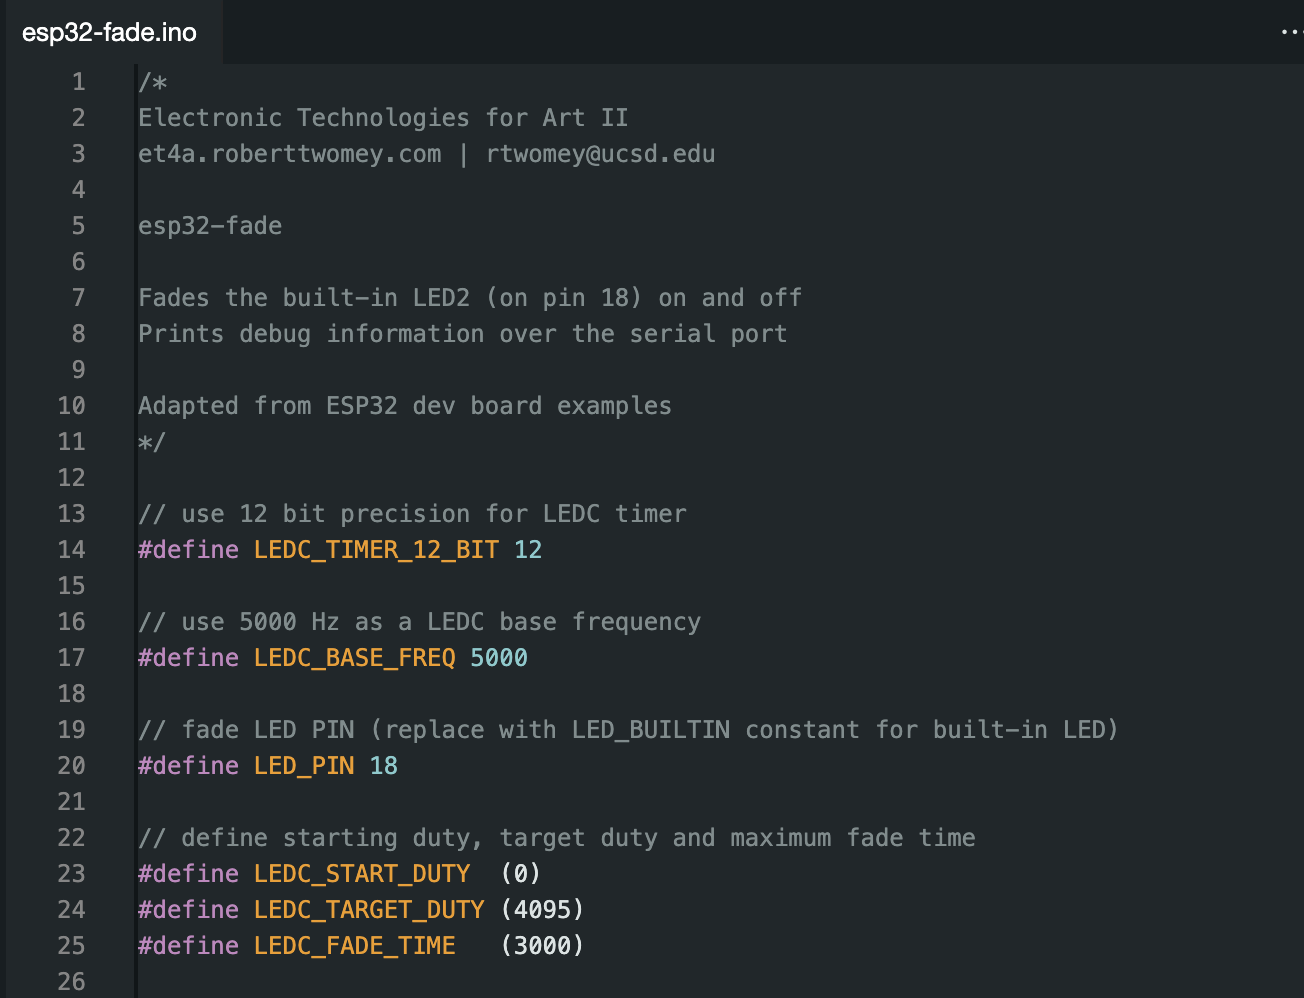
Fades LED2 (pin 18) on and off using analogWrite().
References
[TK]