ucsd-et4a
Week 1 - Introduction, Overview, Hands-On
Agenda
- Introductions
- Review Syllabus
- (basics/outcomes, assignments, policies, schedule, tools/platforms)
- My approach to Electronic Technologies for Art
- Arduino Review Activities
- Digital Input/Output; Analog Input/Output; Meaningful Signal, Meaningful Interaction.
- Sign up for discord (see canvas Week 1)
- ~ break ~
- Review and Hands-On: electronics assessment/what do you remember from 147a?
- Assign Homework
Arduino Assessment / Review
Arduino 1: Intro and Digital Input/Output. (slides)
Code Basics
setup()- runs once, likesetup()in processing. referenceloop()- runs repeatedly, likedraw()in processing. referencepinMode()- tell the arduino whether to use a pin as an input, an output, or the other things it can do (more later on that). referencedigitalRead()- reads the input on a digital pin. referencedigitalWrite()- sets the output on a digital pin. reference
Blink
The hello world of arduino. By default, the arduino will blink a built-in LED (“L”), next to the RX, TX, and POW lights.
- Schematic:
- (no schematic needed, we will use the built in LED on the Arduino nano)
- The built-in LED is attached internally to pin 13 on the arduino
LED_BUILTIN. (see constants in reference)
- Code:
- File->Examples->01.Basics->Blink.ino
- Behavior:
- we will see the LED blinkin on for 1000 milliseconds, and then off for 1000 milliseconds.
Digital Output
https://www.arduino.cc/en/Tutorial/BuiltInExamples/Blink
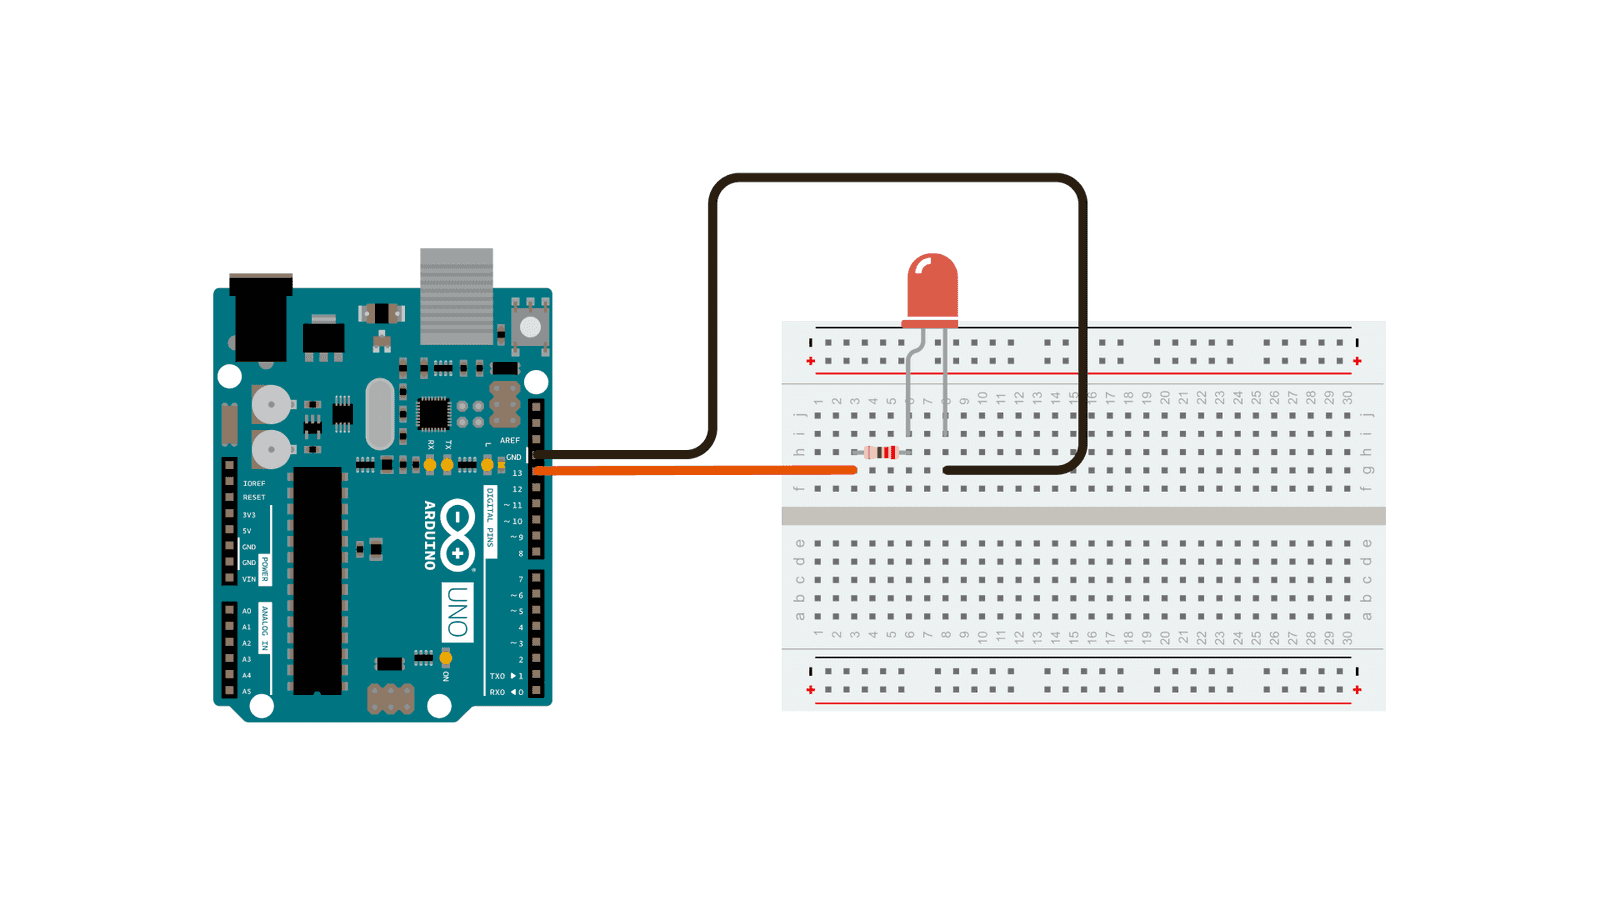
Let’s wire up our own LED attached to a different pin.
- Schematic
- wire up an LED and resistor to a different pin on the arduino, say
D2. - we need one resistor (10k)
- one LED (red?)
- wire up an LED and resistor to a different pin on the arduino, say
- Code
- Make a copy of your Blink code from above.
- we need to change the line in
setup()where thepinMode()is declared. ChangeLED_BUILTINto the
TODO:
- Change the
delay(). Experiment with how the delays change the blinking rate and duration. - Add more blinks. Can you spell out morse code?
Digital Input
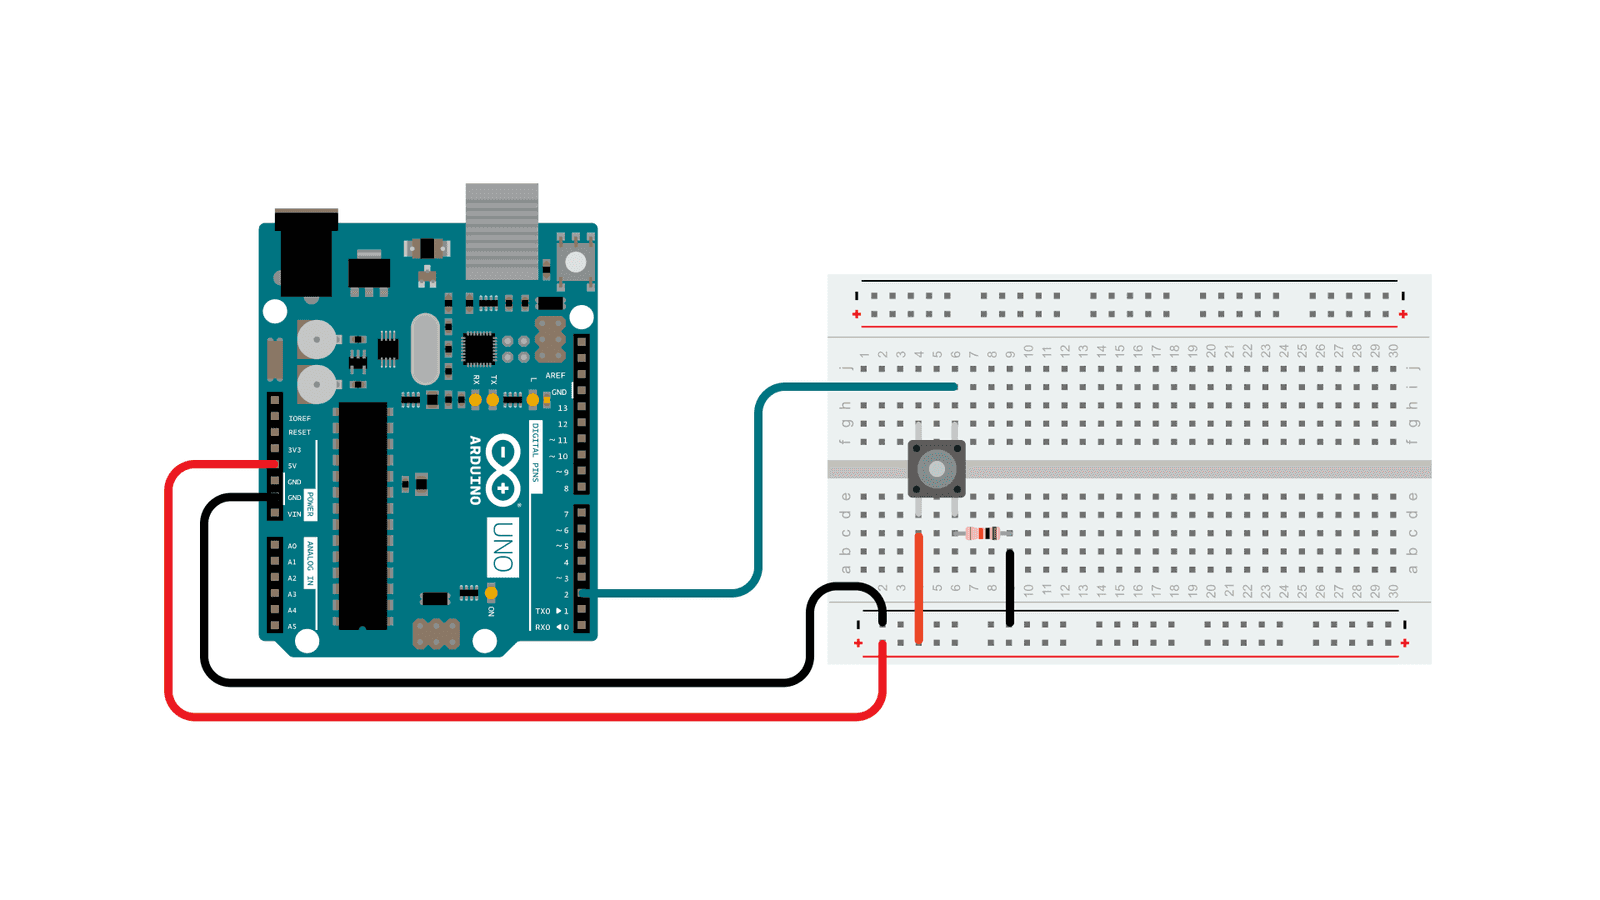
https://www.arduino.cc/en/Tutorial/BuiltInExamples/Button
- TODO
- modify to be a toggle (add a variable that keeps track of on/off)
- use the button input to call a function
Homework
- Fill out the week 1 survey: (check canvas) (DUE End of day today Oct 2)
- (basic info, some questions about interest/enthusiasms, choosing office hours, anything else you wish to share)
- Create a Digital Sketchbook (DUE Oct 9)
- Discussion: Reading: Minds and Brains (DUE Oct 9)
- Exercise 1: Meaningful Signal (DUE Oct 9)
References
Arduino Reference

Breadboard

LED

Resistor


from Sparkfun (link)